Showing posts with label Organization. Show all posts

Monday, July 29, 2013

Publishing Pencils, Reading Group Pencils, and Resource Binders Oh My!

Once again I have another Monday Made It...
 
My goal today was to put some of the resources I have purchased on TpT this summer in binders and to make some fabulous pencils.
 
This is what I started with this morning. A pile of binders, feathers, Duck Tape, pencils, and papers.
 
 
Now, here is what I did ALL this morning.
 
First, I put these great resources into binders.
 
 
I want to give a shout-out to Laura Martin and Lori Rosenberg for sharing these resources. I snagged Laura's Math All Year and Lori's Writing Station Activities and I Can Write...Writing Menu.
 
I plan to use Math All Year for independent work during my math block and Lori's writing resources are for my Work on Writing center.
 
To stay super organized I put all the papers in page protectors so they stay nice and crisp. Also, for the I Can...Writing Menu here is what I did.
 
First, I put the cover in the cover slip of the binder for easy identification. I printed it in black and white to save on color ink.
 
Next, I printed the menu sheets in color on cardstock, laminated them and put them in sheet protectors.

 
I also put a black and white version of the menu choice in the same sheet protector. I did it this way because I plan on introducing each menu choice one at a time. I will store the colored copy in the binder until it is ready to be introduced. It also makes for easy clean up at the end of the year. I will know exactly where to put each menu choice.


Finally, I put the directions sheet behind the menu choice followed by any writing papers that go with that choice. Easy Breezy!


Now, for my second Monday Made It project of the morning.
 
 
***This is not my original idea. I found it somewhere and didn't Pin it. If it is your idea, let me know and I will give you credit.***
 
 
I found this great idea for jazzing up pencils. I made two different sets. One set for my guided reading table and the other set is what I will be calling "publishing pencils".


The feathered pencils is are my "publishing pencils". I will place this in a tin can in my writing center. I'm going to have my students use these during our writing workshop time. Once they have gone through all the steps of the writing workshop and are ready to publish their work they can use a "publishing pencil". My plan is to really emphasis how to use these pencils. The are special pencils and only work if you use your Best. First. Grade. Handwriting. :)
 
 
The pencils with Duck Tape only will be at my guided reading table. Last year there was so much wasted time when it came to pencils. I always told my little ones to bring their pencil but they always managed to forget. Imagine that! Then I placed pencils at the table but they would always take them with them. It seemed like a lose-lose situation.
 
 This year I have a solution. I am going to have pencils at my table ready to go, but they are marked  with Duck Tape so they don't go missing. Problem solved! Hopefully!


Saturday, July 20, 2013

Facebook Fan Freebie! And Making Words Through The Year

I am so excited that I finally figured out how to add the Fan Freebies app to my Facebook Page.
 
Here's my plan...
 
Every Friday of the month, I will link up one of my TpT store items or something that I used in my classroom for the week for free. But, here is the catch, it will only be free for that day. So you better like my facebook page and if you are already a fan you should probably check it out too!
 
 
Become a fan and you will get this week's Fan Freebie.
 
Click the picture below to become a fan of Spotted in First Grade!


Now, for how I/my team organizes and implements Making Words.


My teaching team is made up of six first grade teachers. We have one basket that we share for making words. So, we have a schedule that tells us who is responsible for making that student's making words baggies for the week.
 
Sorry I don't have pictures. But there are three baskets. The largest basket holds gallon sized Ziploc baggies for each letter of the alphabet. Then there is also a basket with cut up sentence strips that have all the words we use for making words. Plus, all the smaller words you can make from that week's mystery word. The third basket is what we use to hold that class sets of letters (the ones we have to make up each week, which I hate doing BTW!).
 
Then, each teacher is assigned a day of the week and a time to do making words in our rooms. I do making words on Thursdays in the afternoon.
 
But, I send home the making words recording sheets that you can find in the Making Words Through The Year packet on Mondays. My students are to do it for homework and then return the sheet on Thursdays. We will then go over them together in class and practice making words together.
 
I recently finished the Making Words Through The Year packet. Before our team would just have the students fill in the boxes with letters, but this year I thought it would save time and energy by creating recording sheets that are already completed.
 
Here is an example of what the recording sheets look like.


And, here is an example of what the letter tile sheets look like.


In the packet, you will find, 29 different words sheets with the letter already scrambled up, letter tile pages that tell you how many sheets to print and on what color of paper, teacher directions, and a list of the words that is included.
 
Click the picture below to check it out in my TpT store.


Yours in Teaching,


Monday, July 8, 2013

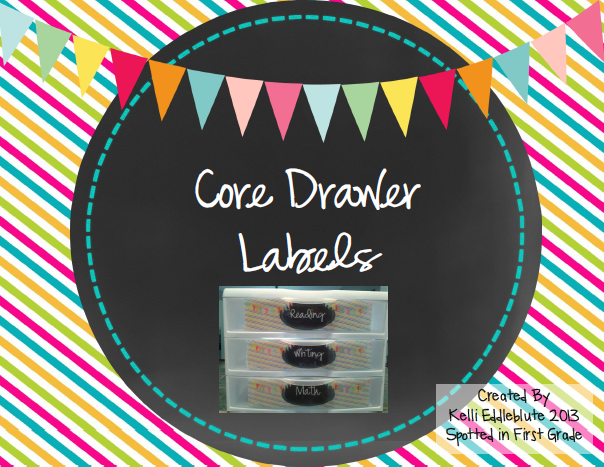
Monday Made It....Core Drawers with a Limited Time Freebie.

I am super excited about today's Monday Made It. This project was inspired by Pinterest. I tweaked it to fit my needs and I am loving it.
 
I bought the larger drawers so the labels I made don't quite fit, but I'm ok with it. If you get the smaller version of the drawers the labels will fit perfectly.
 
The Pinterest version has ten drawers but I only need three. I only wanted to create Core Drawers for reading, writing, and math.


Click on the picture below to get your copy of the labels. They will be free until Wednesday! :)


Here is what I plan on putting in my drawers...


Yours in Teaching,

Friday, July 5, 2013

Favorite Pins...Classroom Organization

 
For this post I am going to focus on my ten favorite classroom organization pins that I would like to incorporate into my classroom next school year.
 
I like the idea of only focusing on one topic at a time. My brain is flowing and I need some way to manage it. :) This coming week I am only going to work on creating organizing things.
 
So here they are. My top ten favorite classroom organization pins to focus on this week.


1. I have the perfect bookshelf to do this with. My plan is to place my word work centers that will be out all year in the file folders. I can't wait to see how this will work.Add folders to the backside of a bookcase for small extension activities or center work. Nice classroom pics
 
 
2. I like this idea and I think it looks super cute. I just don't know if it will work for me. I might just have to make it and test it out to see.
I LOVE THIS IDEA! duct tape and folders to create this - don't need to buy another pocket chart!
 
 
3. I love this frame notes idea. I was recently cleaning out my basement and I found the perfect frame that would work for this. I plan on writing important reminders on it each week.Dry erase boards made out of picture frames! This would be awesome for a teacher's desk to keep reminders/to do's on. Wouldn't get lost in all the other papers :)
 
 
4. This drop box will work wonders. Last year my littles would be so excited to hand me important notes right when they walked in the door. Even though I told them to keep them in their take-home folder they still felt the need to hand them to me. I'm going to try this and see if it works better.
 
For notes, money, etc.


5. I like the idea of having everything displayed. It just seems to make sense. I have a spot for this at the front of my room. We will see if it works out with the new layout I plan on doing.
I LOVE how she used her board so that each subject can stay up throughout the day. A genius professor of mine once said that elementary school should not feel like a segmented day, "Ok we're done with that now next is this.." It should flow from one to another. This board organization would really help the flow of the day...
 
6. I am constantly changing my reading groups. I waste so much paper righting the groups out, rewriting them, and then writing them again to make them look nice and neat. This will save me tons of time and paper. :)
organizing guided reading
 
7. Having everything at your finger tips makes everything run smoothly. I love the idea of having drawers with manipulatives just for me at my finger tips. It makes the idea of principal walk throws less scary knowing that I won't have to stop and search for something that I need to continue a lesson.
Core Drawers -- instructions for what to put in a drawer bin at the teaching area. Great ideas.
 
8. Last year my anecdotal notes consisted of a piece of notebook paper and I wrote names and notes all on one piece of paper. But when it came time for grade cards or conferences it was just a mess and hard to find notes about a particular student. This will be great and it will help keeps my notes organized.
 
use address labels, clipboard, and large index cards. Write your notes on the address labels as you walk around and observe. Later, stick them onto the child's index card. Quick and easy! Then, during parent/teacher conferences, just pull out the note card and share your observations.


9. I have had this idea pinned since last summer. I never tried it but I think it will be a life saver. I had so many littles not put names on papers last year. Like, there were so many that I ended up just throwing their work away because no one could claim there work. This will NOT happen again this year! I REFUSE! 
Students must highlight their name before putting it in the tray. Great way to make sure all papers have names! LOVE THIS!!
 
10. Remember how I said I had a not so well behaved class last year. I'm hoping it was just that group of students and not a first grade thing. But I am going to do everything in my power to not let things get out of control. I am going to pick a mystery walker each time we head out into the hallway. It's just one more way to keep my littles under control. Wish me luck!
FUN Hallway Behavior Management Idea. Before you leave the classroom pick a chip with a students name but don't tell who it is. They are the mystery walker and you are watching that student the entire time. If they do a good job in the hall, they get a ticket or prize.
Now, just for a little humor....
 
So true!
I can only hope! :)
 
Be sure to link up with Cara from the First Grade Parade's Favorite Pins Linky Party.


Yours in Teaching,
 

Tuesday, July 2, 2013

Monday Made It....Sticker Filer and A Flip Book

This was seriously the easiest and fastest Monday Made It I have ever done. It literally only took a trip to the Target Dollar Spot, the teacher store, 2 minutes on the computer, and BAM!

My first Monday Made It is my Stickers For The Year filer.


First, I bought the all new famous pocket filer for $1.00.

Then, I labeled all the tabs with the months of the year. I began with August, since that is the first month of the year in teacher world, and I ended with July.


Next, I placed all the new stickers I bought (I was completely out) in the appropriate month.


Finally, I made a label for the front of the sticker filer, and BAM it's done!


How easy and simple is that?!? I think I'm really going to love this one!


My next Monday Made It is a Nouns, Verbs, and Adjectives Flip Book. I also made some anchor charts to go with it. Check it out here.


Yours in Teaching,


Saturday, June 22, 2013

Optimum Organization...Teacher Planning Binder

I can't say enough how much I like enjoy LOVE organizing. I just sent a text yesterday to my teacher friend that said "I love organizing!"

The linky party Optimum Organization was just made for me!


My organizing tip for this week is how to create and organize a teacher planning binder. You can click on the picture below to get your own copy of my planning cover pages.


Here is the cover page to my teacher planning binder. Right now it's just in a page protector until I can get a binder that has a cover page slip. It's a lot harder to run errands with a 10 week old than I ever imagined.
 
Tip #1 - Get a binder with a cover page slip. This allows you and other teachers to know which binder and who's binder they are looking at or found if you tend to miss place things.

 
Tips #2 - Have your daily lesson plans as the first section in your binder.
 
I look at my lesson plans multiple times in one day. I find it is easiest to have my lesson plans in the front since that is what I use my binder for the most.


Here is what my lesson plan format looks like. And yes! Those are plans for the first week of school. Can you believe I already have the first two weeks planned out!


If you're like me you always write on your last copy of what seems like everything without even knowing it then this is the best teacher organizing tip I could ever give! This picture is my lesson plan template in a page protector.
 
Tip #3 -  Behind all your copies put a master/original copy in a page protector. This keeps you from writing on your last copy and then you know it's time to make more copies. This organizing tip has saved me many a times!

 
Tip #4 - Include any curriculum mapping in your teacher planning binder. That way when you are doing your lesson plans you have a guide right at your finger tips. Keep them both in the same place and it will save you time when planning.

 
Here is my curriculum mapping that I am currently working on. I have about the first 6 weeks finished. I'm going to work on the rest during school.
 
Tip #5 - Curriculum Mapping: I have included spaces for reading, spelling/phonics, math, writing, and science/social studies. I use this map to house any mini lesson, craftivity, or theme project for one week. By no means do I use everything on that page in one week. It is just a guide to help me plan my lessons. It just gives me some ideas.

 
Also in my planning binder, I include a copy of the first grade common core standards. Every once in a while I like to look over them to make sure that I am covering everything that I should be covering.

 
One of my teaching goals for the next school year is to stay in contact with parents more. To help with this goal is my next teaching tip.
 
Tip # 6 - Keep copies of all whole class parent letters in your teaching binder for easy access.
 
This will help you greatly from year to year. There is no reason to reinvent the wheel each year. Keep original copies of all your parent information letters to refer for years to come.
 
Below are some of the letters I have included in my planning binder.


Next I always keep my class lists at hand. This section also has parent contact info.

 
This part is where I keep my more formal guided reading plans. Below you will see what I use to plan out my guided reading groups. It is super simple.


My last section is where I keep all the original copies of my writing workshop resources pack. Since they are originals they are all in page protectors as well.


Yours in Teaching,