Monday, July 29, 2013

Publishing Pencils, Reading Group Pencils, and Resource Binders Oh My!

Once again I have another Monday Made It...
 
My goal today was to put some of the resources I have purchased on TpT this summer in binders and to make some fabulous pencils.
 
This is what I started with this morning. A pile of binders, feathers, Duck Tape, pencils, and papers.
 
 
Now, here is what I did ALL this morning.
 
First, I put these great resources into binders.
 
 
I want to give a shout-out to Laura Martin and Lori Rosenberg for sharing these resources. I snagged Laura's Math All Year and Lori's Writing Station Activities and I Can Write...Writing Menu.
 
I plan to use Math All Year for independent work during my math block and Lori's writing resources are for my Work on Writing center.
 
To stay super organized I put all the papers in page protectors so they stay nice and crisp. Also, for the I Can...Writing Menu here is what I did.
 
First, I put the cover in the cover slip of the binder for easy identification. I printed it in black and white to save on color ink.
 
Next, I printed the menu sheets in color on cardstock, laminated them and put them in sheet protectors.

 
I also put a black and white version of the menu choice in the same sheet protector. I did it this way because I plan on introducing each menu choice one at a time. I will store the colored copy in the binder until it is ready to be introduced. It also makes for easy clean up at the end of the year. I will know exactly where to put each menu choice.


Finally, I put the directions sheet behind the menu choice followed by any writing papers that go with that choice. Easy Breezy!


Now, for my second Monday Made It project of the morning.
 
 
***This is not my original idea. I found it somewhere and didn't Pin it. If it is your idea, let me know and I will give you credit.***
 
 
I found this great idea for jazzing up pencils. I made two different sets. One set for my guided reading table and the other set is what I will be calling "publishing pencils".


The feathered pencils is are my "publishing pencils". I will place this in a tin can in my writing center. I'm going to have my students use these during our writing workshop time. Once they have gone through all the steps of the writing workshop and are ready to publish their work they can use a "publishing pencil". My plan is to really emphasis how to use these pencils. The are special pencils and only work if you use your Best. First. Grade. Handwriting. :)
 
 
The pencils with Duck Tape only will be at my guided reading table. Last year there was so much wasted time when it came to pencils. I always told my little ones to bring their pencil but they always managed to forget. Imagine that! Then I placed pencils at the table but they would always take them with them. It seemed like a lose-lose situation.
 
 This year I have a solution. I am going to have pencils at my table ready to go, but they are marked  with Duck Tape so they don't go missing. Problem solved! Hopefully!


Saturday, July 27, 2013

Thoughts on Interactive Writing???

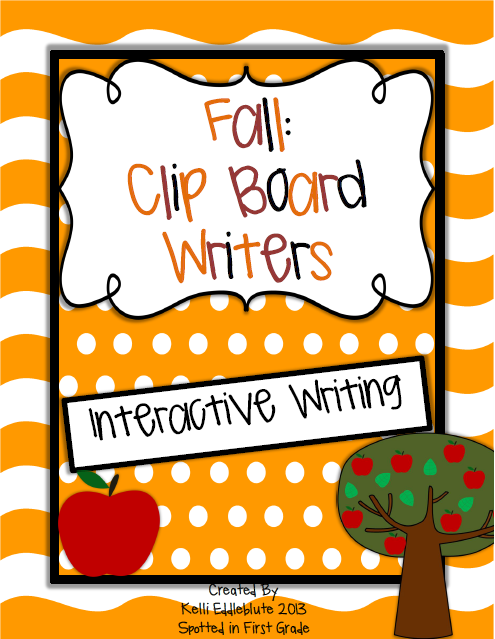
Ok, last year I began to work on my interactive writing pack. It is something that our entire first grade team does. I wanted to "beef" it up a little. To be completely honest, I started the year off doing interactive writing and then it just fell to the way-side.
 
 
I'm hoping since I F.I.N.A.L.L.Y. finished "beefing" it up I will stick with it this year. I think I gave up because of my lack of unpreparedness (word?) and the squirrely little ones I had. They could not sit still and focus for the life of them.
 
 
Here is what I came up with and what I plan on doing.


First, I typed up all the interactive writing pieces we use in the fall. There are 12 different pieces. I just use these pieces as a guide. But, once we are in action and working on "sharing the pen" we change the wording and basically use what we have learned or already know to write.


This is what I added...
 
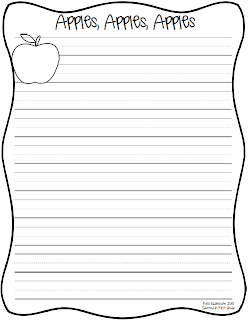
I added individual writing sheets for each students. While we are working together and "sharing the pen" the rest of my little ones will also be writing while they are seated at the carpet. Hence the name Clipboard Writers, they will be using clipboards to write on.


 Hopefully this helps with the squirrellyness ( I love making up new words.).
 
I made two sheets of each topic. That way I can copy them back-to-back in case I have some little ones that write extra large.
 
Now, I'm eager to get my Winter and Spring Clipboard Writers pack completed.
 
Click on the picture below to get your copy. Plus, leave a comment. I'm curious do you do interactive writing in your classroom? And how do you do it?


Yours in Teaching,
 

Friday, July 26, 2013

Friday Facebook Fan Freebie

Today is my first installment of my Friday Facebook Fan Freebie.


Since I have been really focusing on getting my writing workshop organized I thought I would offer my Writing Keepsake.
 
 
The writing keepsake is a good way to progress monitor your students' writing while also making a keepsake for them to take home at the end of the year.
 
 
On the last school day of each month I have the kids free write in these journals. I do not write in them or place any markings on their work solely because I want them to take these journals home.
 
 
There are 3 different writings in this packet. The are blank pages for each month so your little ones can choose to write whatever pleases their little hearts. There are also informative writing and narrative writing themes for each month.
 
You can pick and choose whatever works best for your classroom.
 
The picture is distorted but the actual product is not.


Make sure you become a fan of my Facebook page so that you can get this for free today only!
 
Yours in Teaching,


Thursday, July 25, 2013

My Classroom Redo

My classroom is done! My classroom is done! And it is only July! Well, for the most part. I have all the furniture and bulletin boards completed. All I have left to do is copy some papers, add some student labels, and set up my word work station. Ok so maybe I'm not done. I thought I was until I started typing. Boo :/
 
 
Ok, so here is what I got completed today in only 3 hours. I was basically stuck at school waiting for my car's oil change to be done. So I couldn't leave and I was basically forced to complete things I have been putting off.
 
I'm putting up a ton of pictures. I am going around my room clockwise starting from the view looking into the room.
 
#1. Here is the view looking into my room. I have 7 tables and my room will not hold any more. So, 7 x 4 is 28...so that means I can't have more than 28 little ones, right!?!? I hope that is what it means. P.S. I am the only one with tables in first grade. I think that's a good thing. Maybe...
 
On the tables I have baskets that hold books for early finishers, pencils, and wet glue that everyone shares. There are tubs under their chairs where they will put their own supplies like pencils, scissors, glue sticks, math books, etc. (I apologize that the pic is blurry.)


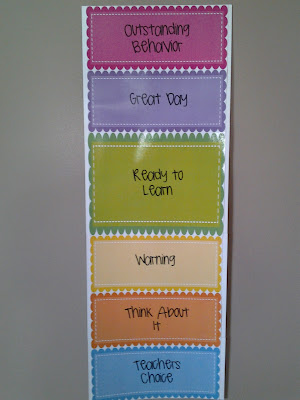
#2 This is to the left of the door right when you come in. Last year I had my job chart on the board and a mini filing cabinet here. This year I have place my ONE student computer and our class calendar. My teacher's assistant will be responsible for the calendar changes every day. The blue pocket chart on the wall is for my good behavior tickets. I can't wait to see how it works out.


#3 My cabinets... I have the rules and my writing process chart. I will also display student work in the empty spaces.


#4 The blue things are my word wall. Underneath the word wall is our classroom library, Math T.I.M.E. baskets, and the empty boxed area is for anchor charts.

 
#5. This is my teacher corner and the table is where I will be having guided reading lessons and where I will meet with my small groups for math and writing. I have everything labeled and organized in the tubs on the shelf. The red, blue, yellow, and green folders are for my lesson papers for the week. The book shelf holds anything extra I use daily, and the tubs to the left hold my calendar supplies, etc..

 
#6 This is where I will be keeping my math supplies. I will be doing a post on it once I get my schedule finalized and figured out. But, the tubs on the top are for my math groups that are similar to Daily 5. The green tubs will have numbers on them for early finisher math work (similar to Cara Carroll's Dessert Tubs).

 
#7 This is the writing corner. The table will house all the different writing supplies that I plan on putting out for my little ones to use. They will also be able to sit at this table to work during Work on Writing. I just don't have enough chairs.
 
A quick vent...I only have chairs for my student's desks. No chairs for the writing center, no chairs for the Word Work center, and no chairs for my guided reading table!!!! ARRR
 
The green board will hold the daily writing anchor chart. Right now I have my Giving Tree up for Open House. I still need to finish it. The green shelf is holding my CD player, but I have no idea what to put on it. Any ideas?

 
#8 This is my teacher computer and Daily 5 board. I have to have my computer at the front of the room because it is connected to the Elmo, which I use All.The.Time.! I also have my core drawers on the first shelf since I spend a lot of time up here teaching.

 
#9 Here is the front of the room. This is to the right of my teacher computer station.
 
Here I have my SMARTBoard and my writing menu board. The board will be filled up with writing choices for Work on Writing as the year progresses. The filer will hold all the different writing papers. This area is still a work in progress.

 
#10 My Word Work Center.
 
The book shelf will hold all the Word Work manipulatives. The colored drawers, which I just got today at Sam's Club for $24.99, will hold all the Word Work recording sheets. This area is also a work in progess

 
#11 The Word Work Manipulatives book case...

 
#12 This is what my little one's cubbies look like. On the shelf are my monthly file tubs. I only put word work and math center games, morning work, and fluency practice sheets in these tubs. They do not hold worksheets.


#13 This is the end of my room. This is the left of the door when you walk in. I have my birthday board and sink. Under the fabric is where I put tissues since there is like NO storage in my room.

 
So, basically my room is complete! I would love to hear your feedback. Leave a comment and make sure you become a fan of Spotted in First Grade's Facebook Page to get the Facebook Fan Freebie.
 
Remember, tomorrow is Friday so be on the look out for my Flash Friday Facebook Fan Freebie. It may be something amazing or it may not. Wink, Wink...


Monday, July 22, 2013

Classroom Design Day 1 and 2

It has officially begun. It is time to stop "thinking" about school things and classroom designs and it is time to start "doing" it.
 
 
Last week sometime, I made the hubster and the little man go into school with me for the first time. I needed him (the hubster) to help me move all my furniture around. I want a FRESH start this year so I thought it would be a good idea to rearrange my room. So that was Day 1. I was so excited that I didn't even think to take pictures.
 
 
However, today I did remember. Today my goal was to get my bulletin boards placed and up. Here is what I came up with.
 
The back of the room:
  
 
This is my new small group reading/math corner. Last year I had an easel and calendar/Daily 5 in the back of the room. This year I wanted to have guided reading and math here. Ignore the faded board, I didn't change it out and I am going to cover it up.
 
The blue side is for CAFE and reading related things. The purple side is going to be a mini math resource wall. I don't plan on filling the boards up until students arrive. I want the room to be like a canvas for them.
 
The tubs house my guided reading books, manipulatives and resources, and other teacher related things that I might need throughout the day.
 
The front of the room:
 
 
Here is what the front looks like so far. It has a long ways to go still. The blue board is where I am going to put my writing menu for Work on Writing. The filer underneath is where I am going to put all the papers that go with the menu choices.
 
On the left I have my computer desk and Elmo that is connected to the SMARTBoard. Above the computer is my Daily 5 board and I will be putting other reading related things in the blue box. The green board is for the days current anchor chart. It could be reading, writing or math. It just depends on what we are learning that day. OR if we have to display our learning objectives that is where I will put them.
 
The doorway:
 
 
When you walk into my room there is a mini bulletin board and red cabinets. I feel like it is wasted space. I moved the student compute here and I also put the calendar on this board. Last year I had the job chart (I'm moving that to the door).
 
So far I like what I have done. The next day I go in I would like to work on decorating the boards and work on setting up my writing center.
 
 
Yours in Teaching,


Monday Made It for the Home and School

Monday again already?!?!
 
 
This is the first time I have a Monday Made It for my home and school. I have been very busy.
 
 
#1. First, my home Made It. I was too eager for this project that I forget to take a before picture. My mom, sister, and I are prepping for a garage sale this weekend and I found this old mirror in my basement from my college days. I was going to sell it but then I thought it would look perfect as a chalkboard in my kitchen.
 
 
The board was like a brownish/copperish color. Eww, and the mirror was all funny looking. Probably because I bought it at Big Lots.
 
 
So here is what I did...


First I spray painted the whole thing with white paint. I believe I did three coats of white. I let it dry and then I painted over the mirror part with the chalkboard paint.
 
 
If I were to do it again, I would use a brush instead of a sponge roller because the chalk is all bumpy because of air bubbles. I still love it.
 
 
#2. Now for school, I finally put together my new behavior chart.


I love the colors, the scalloped edges, and the steps that the students can move to.
 
 
#3. My third Made It is one of my TpT items. I desperately needed to revamp my grammar book. It was too boring looking. I changed the cover page, the font, and some of the wording. If you already have this make sure to re-download it. :)
 
 
#4. And my last Made It is my new before, during, and after reading question cards. I can't even think of the number of times I thought last year I would love to have a resource like this to use. I have been waiting to see if I could find anything on in the TpT/Blog world and I just never found anything I was looking for. So , I decided to just go for it. Here is what I cam up with.
 
There are 60 question cards. 20 for before reading, 20 for during reading, and 20 for after reading. Plus ring labels that say before, after, and during reading question cards.


Now, I need to pack up some school stuff and my little man. We are off to school to set up my classroom. I will post later to tell you how it went.


Saturday, July 20, 2013

Facebook Fan Freebie! And Making Words Through The Year

I am so excited that I finally figured out how to add the Fan Freebies app to my Facebook Page.
 
Here's my plan...
 
Every Friday of the month, I will link up one of my TpT store items or something that I used in my classroom for the week for free. But, here is the catch, it will only be free for that day. So you better like my facebook page and if you are already a fan you should probably check it out too!
 
 
Become a fan and you will get this week's Fan Freebie.
 
Click the picture below to become a fan of Spotted in First Grade!


Now, for how I/my team organizes and implements Making Words.


My teaching team is made up of six first grade teachers. We have one basket that we share for making words. So, we have a schedule that tells us who is responsible for making that student's making words baggies for the week.
 
Sorry I don't have pictures. But there are three baskets. The largest basket holds gallon sized Ziploc baggies for each letter of the alphabet. Then there is also a basket with cut up sentence strips that have all the words we use for making words. Plus, all the smaller words you can make from that week's mystery word. The third basket is what we use to hold that class sets of letters (the ones we have to make up each week, which I hate doing BTW!).
 
Then, each teacher is assigned a day of the week and a time to do making words in our rooms. I do making words on Thursdays in the afternoon.
 
But, I send home the making words recording sheets that you can find in the Making Words Through The Year packet on Mondays. My students are to do it for homework and then return the sheet on Thursdays. We will then go over them together in class and practice making words together.
 
I recently finished the Making Words Through The Year packet. Before our team would just have the students fill in the boxes with letters, but this year I thought it would save time and energy by creating recording sheets that are already completed.
 
Here is an example of what the recording sheets look like.


And, here is an example of what the letter tile sheets look like.


In the packet, you will find, 29 different words sheets with the letter already scrambled up, letter tile pages that tell you how many sheets to print and on what color of paper, teacher directions, and a list of the words that is included.
 
Click the picture below to check it out in my TpT store.


Yours in Teaching,


Wednesday, July 17, 2013

Writing in My Classroom

Writing has been one of my of the many things I have focused on this summer. I have created some writing resources for my classroom, but I have also purchased many different resources to help my writing block.
 
 
I personally feel like my writing block was not organized last year. I would basically just wing everything. Sometimes great things happened and sometimes it was a major flop.
 
 
Another one of my goals is to create a writing block using by implementing writing workshop. I also wanted to revamp my Work on Writing station.
 
 
Here are some amazing things I have pinned over the summer, some things I have created, and of course some AMAZING resources I have purchased.
 
 
1. My first pin is something that I created. I wanted to start with creating a writing workshop starter kit that I thought would work best for myself and my students. Here is what I came up with.
 
 
There are anchor charts describing how to edit and revise, peer edit, and steps for sharing published work.
 
There are also many different teacher checklists, conferring sheets, peer editing checklists, and rubrics.
 
My favorite things are the letter that I will send home to parents describing our writing block, the writing process chart, and the August/September calendar that I will use to jump start my writing workshop mini lessons.
 
 
2. My other resource that I have pinned is my Grammar and Punctuation Rule Book. I use this to introduce, practice, and review 25 different grammar and punctuation rules. It's so simple yet my little ones love it. They first write a sentence that uses the current rule, then they draw a picture to match the sentence.
 
 
3. My third pin and the last thing I created is my writing keepsake journal. I plan on using this to monitor my little ones writing. On the last day of each month I will have my little ones writing in their keepsake journal. Not only is this something that allows my little ones and myself track their writing, it will also go home at the end of the year for parents to keep.
 
 
Now for things I have pinned from others.
 
4. I love this letter for parents. Last year I had a couple parents question me about inventive spelling and why I don't tell my little ones to spell words. Here is a perfect letter that I think will get the point across.
Inventive spelling letter for parents!
5. I found these amazing free letter writing practice sheets. These will be great to send home with my little ones that are still struggling with writing their letters.
 
 
Free handwriting sheets for each letter!
6. I pinned this last year, made my own, and used it every week. It was a great resource to use when I conferenced with my little ones.
 
Writing Goals
7. I found this anchor chart on pinterest and this is the one that I created. I never took the time to talk about how important illustrating our writing is. This is an anchor chart that I plan on using to teach that concept.
 
How to Make a WoW Picture by Spotted in First Grade
8. I also found these writing anchor charts. This is the one that I created. I plan on laminating it so that I can reuse it throughout the school year.
Fillable Anchor Chart by Spotted in First Grade
9. This is something that I purchased from Lori Rosenberg. I can't wait to see this in action.
 
004
 
10. And my last writing idea. I also purchased several writing through the year packets made by some great TpT Sellers. Sorry I don't have a picture for these. :/
 
My Giveaway ends tonight!


Yours in Teaching,